Checklist for Screen Printing: 20 Quality Control Steps
Screen printing might seem straightforward, but a small oversight—like ink that’s too thin or a misaligned screen—can ruin an entire order. As a screen printer with 10 years of experience, I know a clear, practical guide is exactly what newcomers need. This 20-step checklist covers everything from design prep to final inspection, distilling real-world experience to help you produce high-quality prints. Each step includes specific actions, common issues, and troubleshooting tips, making it perfect for beginners to quickly get up to speed.
Why Quality Control Matters for Newbies
Quality control is your secret to saving time and money. Overlooking details can lead to wasted materials, rework, and even lost clients. This checklist helps you:
- Save Time and Money: Catch issues early, reduce reworks.
- Ensure Consistent Quality: Every print meets client expectations.
- Grow Quickly: A systematic inspection process turns you from novice to expert.
Key Step Alert: Steps 1, 4, 9, and 17 are the most critical—master them first! For small studios or when time is tight, you can simplify some steps (see Flexible Options). Below, the 20 steps are broken down by printing phase: preparation, printing, and inspection.
Process Overview
This table outlines the 20 steps in order, helping you quickly grasp the essentials:
| Phase | Steps |
|---|---|
| Pre-Printing Prep | 1-3: Design Check (format, size, client needs) 4-6: Screen Prep (defects, tension, cleaning) 7-9: Ink Handling (mixing, viscosity, testing) |
| Printing Process | 10-11: Squeegee Check (condition, angle/pressure) 12-14: Substrate Prep (quality, securing, pre-treatment) 15-16: Printing Technique (consistent pressure, issue monitoring) |
| Post-Printing Insp. | 17: Color Matching 18: Defect Check 19-20: Durability Tests (light wash, abrasion/stretch) |
Pre-Printing Preparation
These 9 steps are the foundation of successful printing. Do them diligently, and your prints will be twice as good with half the effort!
1. Check Design File Format and Resolution
Ensure your design files are print-ready. Use vector formats (AI, EPS, PDF—they won’t pixelate when scaled) or high-resolution images (at least 300 dpi; below 150 dpi will result in blurriness). Choose Pantone spot colors or CMYK color mode; RGB will cause color distortion. Zoom in on the file to 200% to check for clarity. If blurry, ask the client for a higher-resolution version. No professional software in your small studio? Use a free tool like Inkscape to check formats, or print a 1:1 draft and tape it to the substrate to confirm the look. Discuss RGB color shift risks with clients beforehand to avoid later adjustments.
2. Confirm Design Size and Fonts
The design size must match print requirements (e.g., a T-shirt chest graphic is usually about 30×40 cm). Ensure all elements are within the safe area, maintaining a 2-3mm margin to prevent accidental cropping. All text must be converted to outlines (curves); otherwise, the printer might substitute fonts and ruin the design. Use Illustrator’s “Align” tool to ensure elements are centered. Print a 1:1 draft and tape it to the substrate to check the size. Have the client sign off on a PDF proof before printing to minimize disputes. For small studios, sending a photo to the client for confirmation works well.
3. Cross-Reference Client Requirements
Check the design file for spelling or formatting errors and confirm that colors and layout adhere to the client’s brand guidelines. Print a design preview and meticulously compare it against the client’s checklist, paying special attention to spelling and logo placement. Spelling mistakes or deviations can lead to client dissatisfaction, so confirm with the client via email or phone beforehand. Short on time? Quickly cross-check key elements (like colors, text) and send a photo for confirmation. Small studios can use messaging apps like WeChat to communicate with clients and ensure the design meets expectations.
4. Inspect Screen for Defects (Core Step)
Screen defects like pinholes or tears can cause ink to bleed, ruining your design. In a darkened room, use a flashlight to inspect: pinholes will show light through. Repair small defects with block-out tape or emulsion; large damage requires replacing the screen. Neglecting this check can lead to unwanted ink spots, affecting the entire batch’s quality. Make it a habit to record screen conditions after each stencil creation. No flashlight in your small studio? Use a magnifying glass to inspect inch by inch, ensuring nothing is missed.
5. Ensure Screen Tension and Alignment
Screen tension (18-25 N/cm, depending on mesh count) impacts print clarity; low tension causes blurriness, while high tension can tear the mesh. For multi-color prints, use registration marks (crosshairs) to align each screen. When checking tension, tap the screen; it should produce a clear, crisp sound. Misalignment will ruin multi-color designs. Newcomers should practice single-color printing first, then move on to multi-color. No tension meter in your small studio? Manually press the screen to feel its elasticity; if it feels loose, remesh.
6. Clean the Screen
A clean screen ensures clear prints. Residual ink or dust can interfere with the emulsion, leading to blurriness. Use a degreaser and brush to clean, then check for impurities after drying. A high-pressure washer is efficient but can damage the screen if the pressure is too high; use a lint-free cloth to dry and prevent dust. Ignoring cleaning can result in incomplete designs. No pressure washer in your small studio? Use warm water and a soft brush, rinsing thoroughly.
7. Precisely Mix Inks
Accurate ink colors rely on precise mixing. Use an electronic scale to weigh inks and additives according to manufacturer guidelines (accurate to the gram), and ensure correct curing temperatures. Random mixing can lead to inks that aren’t wash-resistant. Record each formula for easy replication. Test a small batch before scaling up production to avoid waste. No electronic scale in your small studio? Use measuring cups carefully and stir thoroughly to ensure even mixing.
8. Check Ink Viscosity
Ink viscosity determines printing smoothness. Ideally, it should be like thin cream; too thick, it won’t print evenly; too thin, it will bleed. Use a viscometer to test, or observe a drop’s flow (it should spread slowly). Gradually add reducer, stir evenly, and retest, noting the adjustment amount. Improper viscosity will affect design integrity. No viscometer in your small studio? Dip a finger into the ink to feel if it flows smoothly; if it flows too quickly, it’s too thin.
9. Test Print to Verify Color (Core Step)
Perform a test print on the target substrate (e.g., cotton, polyester) and compare it against a Pantone color swatch or the design file, checking color and opacity. Different substrates absorb ink differently, so skipping this test can cause color discrepancies. Use a 5000K light source (daylight lamp) for inspection to avoid misleading colors from regular lighting. Test at least 3 pieces and record the results. Short on time? Test 1-2 pieces for a quick comparison. No color swatch in your small studio? Compare against client samples, or use your phone’s flashlight near daylight temporarily.
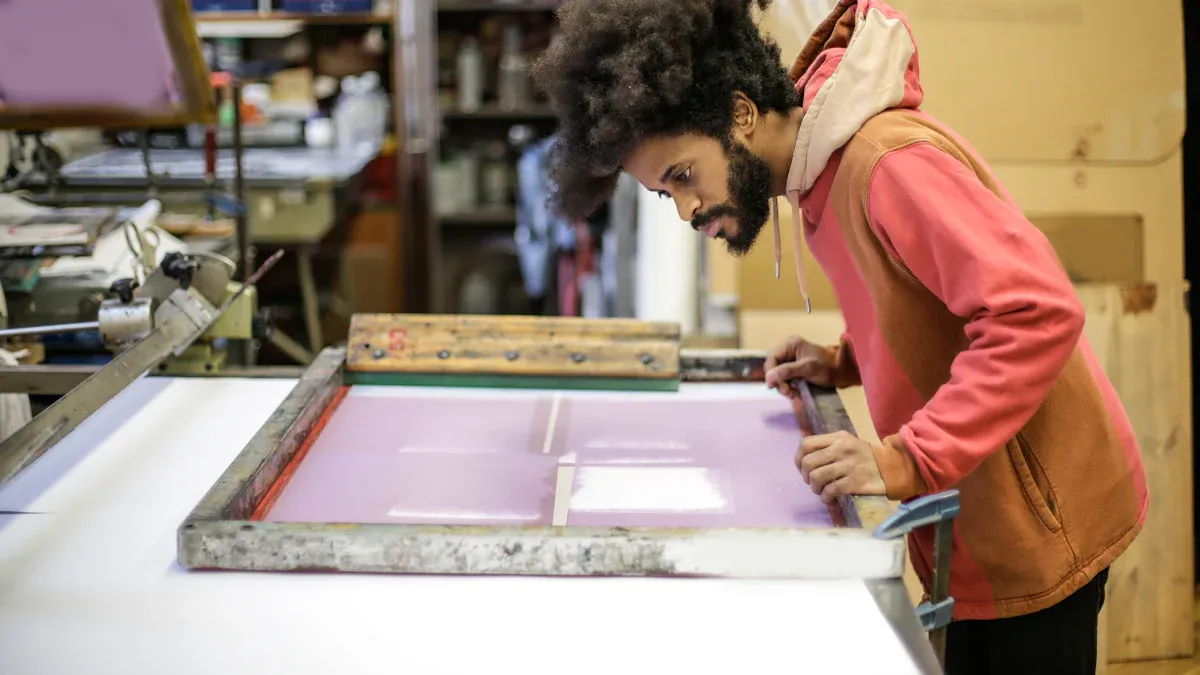
Printing Process
These 7 steps test your operational skills. Stay focused for more consistent prints!
10. Check Squeegee Condition
The squeegee edge must be smooth, without nicks or wear, otherwise, it will cause streaks or ink bleed-through. Wipe with alcohol before printing, and check for smoothness. It’s recommended to replace the squeegee every 5,000 prints. A worn squeegee will compromise print consistency. For small studios, you can gently sand minor nicks to extend the squeegee’s life, but severe wear requires replacement.
11. Adjust Squeegee Angle and Pressure
Adjust the squeegee angle (60-75 degrees) and pressure based on the substrate; use higher pressure for thick cotton and lighter pressure for thin fabrics. Too much pressure pushes out excess ink, while too little results in incomplete coverage. Start with low pressure, gradually increase, observe coverage uniformity, and record the optimal settings. Manual printing? Rely on your feel, maintaining a steady push-pull motion; newcomers can ask experienced printers for guidance.
12. Check Substrate Quality
Inspect the substrate for stains, wrinkles, or loose fibers. Small spots on dark fabrics are especially important to note. Use a bright light to examine each piece and discard any substandard substrates. Flaws will affect ink adhesion and lead to waste. Record supplier batch quality to trace issues. For small studios, use a desk lamp instead of a bright light for careful observation.
13. Properly Secure Substrate
The substrate must be flat and securely fixed on the platen, without wrinkles, and with the design aligned. Loose material will cause misaligned prints. Use tape or clamps to secure it, and manually check stability before printing. Newcomers should practice securing single pieces before moving on to batch operations. Short on time? Quickly check that critical areas (like the design center) are aligned.
14. Pre-Treat Substrate (If Needed)
Polyester or waterproof fabrics may require a pre-treatment spray to enhance ink adhesion. Cure according to the manufacturer’s instructions. Skipping pre-treatment can lead to ink peeling. Test the pre-treatment effectiveness before bulk printing and record parameters. No spray equipment in your small studio? Use a sponge to apply the pre-treatment liquid evenly, ensuring thorough coverage.
15. Maintain Consistent Print Pressure and Angle
Even pressure and angle (60-75 degrees) ensure consistent ink coverage. Inconsistency will lead to uneven thickness. Practice a smooth push-pull motion with the squeegee, and check the first print for quality. Manual printing? Maintain a rhythmic motion; ask an experienced printer for guidance on the feel. Newcomers should practice multiple times to find the right amount of force.
16. Monitor for Smudging, Bleeding, or Misalignment
Every 5-10 prints, check for smudging (ink too thin or too much pressure), bleeding, or misalignment (loose screen). Use a magnifying glass to check fine details; edges should be sharp. If you find an issue, stop immediately and adjust screen tension or squeegee settings. Small studios can check every 3 prints to ensure quality.
Post-Printing Inspection
The final 4 steps determine whether your prints pass client inspection. Thorough checking is crucial!
17. Compare Print Colors with Design File (Core Step)
Use a 5000K light source (light booth or daylight lamp) to compare the print with the design file or Pantone color swatch, ensuring color consistency. Regular lighting can be misleading. Record any color differences and adjust ink or parameters. No light booth in your small studio? Use your phone’s flashlight near daylight for inspection, or compare with client samples.
18. Check for Print Defects
Inspect each print for pinholes, uneven ink, smudging, or improper curing. Use tape to test adhesion; poorly cured ink will stick to the tape. Randomly spot-check 10% of prints, using a magnifying glass for details. Newcomers should check each piece to build the habit. Short on time? At least spot-check 5 pieces to ensure no major issues.
19. Perform a Light Wash Test
Gently wash a test print with a neutral detergent to check for fading, cracking, or peeling. Insufficient durability indicates low curing temperature or an incorrect ink formula. After washing, air dry and rub by hand to check for ink transfer. Record curing settings. Small studios can hand wash to simulate client use. For small batch orders, testing 1 piece is sufficient.
20. Condut Abrasion or Stretch Test
Rub the printed area 50 times with a rough cloth or stretch the fabric to check if the ink cracks. Elastic substrates (like sportswear) require special attention for stretch testing. Use an abrasion testing machine or manually rub and record results. Small studios can use a towel, rubbing 30 times to observe. Short on time? Prioritize testing elastic substrates.
Quality Control Records and Improvement
Record Quality Data
After each print run, record problems (pinholes, smudging), causes (ink too thin), and solutions (adjusting viscosity). Use Excel or a notebook to log “Date – Problem – Cause – Solution – Result.” This log is your “experience library,” and long-term accumulation will improve your skills. For small studios, paper records are just as effective.
Continuous Improvement
Review your log monthly to identify recurring problems (e.g., misalignment due to aging equipment). Discuss with your team to optimize processes, equipment, or training. Data-driven improvement will transform you from a novice to an expert. Small studios can summarize weekly, gradually refining operations.
Benefits of Quality Control
| Benefit | Description |
|---|---|
| Save Time & Money | Catch issues early, reduce rework, save costs. |
| Consistent Quality | Every print meets standards, earning client trust. |
| Client Satisfaction | Durable prints lead to repeat business and referrals. |
| Skill Improvement | Data-driven optimization helps you grow quickly. |
Frequently Asked Questions
Why do I have pinholes?
This could be due to screen defects or uneven emulsion. Check with a flashlight (Step 4), then repair pinholes or re-expose the screen.
Colors are inconsistent?
This often points to incorrect ink mixing or substrate differences. Mix ink according to guidelines (Step 7), test print (Step 9), and compare using a 5000K light source (Step 17).
How can I prevent smudging?
Smudging usually means the ink is too thin or the pressure is too high. Check viscosity (Step 8), adjust pressure (Step 11), and secure the substrate properly (Step 13).
- Why Quality Control Matters for Newbies
- Process Overview
-
Pre-Printing Preparation
- 1. Check Design File Format and Resolution
- 2. Confirm Design Size and Fonts
- 3. Cross-Reference Client Requirements
- 4. Inspect Screen for Defects (Core Step)
- 5. Ensure Screen Tension and Alignment
- 6. Clean the Screen
- 7. Precisely Mix Inks
- 8. Check Ink Viscosity
- 9. Test Print to Verify Color (Core Step)
- Printing Process
- Post-Printing Inspection
- Quality Control Records and Improvement
- Benefits of Quality Control
- Frequently Asked Questions