What Machine Do I Need to Start a Screen Printing Business
Screen printing is hot as hell right now. From streetwear brands to big factory orders, the demand for custom stuff is keeping this craft alive and kicking. Wanna open a print shop and make some serious cash? Gear is your first hurdle. This article lays out a no-BS guide to the machines you need and how to pick ‘em without breaking the bank or screwing yourself over. Big question: with all the options out there, how do you choose the right stuff? Stick with me, we’ll break it down step by step.
Screen Printing Business Overview
Before you dive into buying machines, you gotta know how this game works. At its core, screen printing is about pushing ink through a stretched mesh screen with a design cut into it, slapping your artwork onto T-shirts, paper, plastic, you name it. Sounds basic, but here’s the magic: it works on damn near any flat surface. Clothing companies crank out tees and hoodies, ad agencies churn out posters and banners, packaging folks jazz up bottles and boxes, and even artists use it for limited-edition prints. The possibilities are endless.
Your gear depends on how big you’re playing. Small-time gig, like printing custom tees in your garage? A manual press and some basic tools will do, cheap and effective. Mid-size operation, taking orders from local shops? You’ll need semi-automatic machines and solid drying gear to keep up. Going big, supplying national brands? Full-on automated lines, tunnel dryers, and high-end platemaking equipment are the name of the game—speed and scale rule. Figure out your endgame, and your equipment list will start making sense.
Core Equipment List
Printing Equipment
The screen printing press is the heart of your operation, calling the shots on how fast and how good you can print. You’ve got three main flavors: manual, semi-automatic, and fully automatic, each with its own vibe.
- Manual Press: The entry-level workhorse, all muscle-powered, and dirt cheap—think a few grand to get started. Perfect for small startups, like cranking out custom tees in your garage. Pros: low cost, easy to maintain, fine for a few dozen prints. Cons: slow as molasses, and your arms will hate you after a big run. Best for small batches and tight budgets.
- Semi-Automatic Press: A step up, with the screen moving mechanically but you still scraping the ink by hand. Price tag’s mid-range, say $10,000 to $30,000. Great for mid-size gigs, like handling a few hundred shirts for local stores. Pros: faster, consistent quality, saves some elbow grease. Cons: takes time to learn, and it eats up more floor space.
- Fully Automatic Press: The big leagues, fully automated—screen, ink, and material handling all done for you. These bad boys cost a fortune, $100,000 and up. Built for factories pumping out thousands of pieces for national brands. Pros: insane speed, multi-color printing, top-notch quality. Cons: huge upfront cost, tricky maintenance, overkill for small shops.
Which one? Ask yourself: How many orders am I handling? What’s my budget? Small hustle, go manual. Mid-size, semi-auto’s your friend. Big dreams, save up for full-auto.
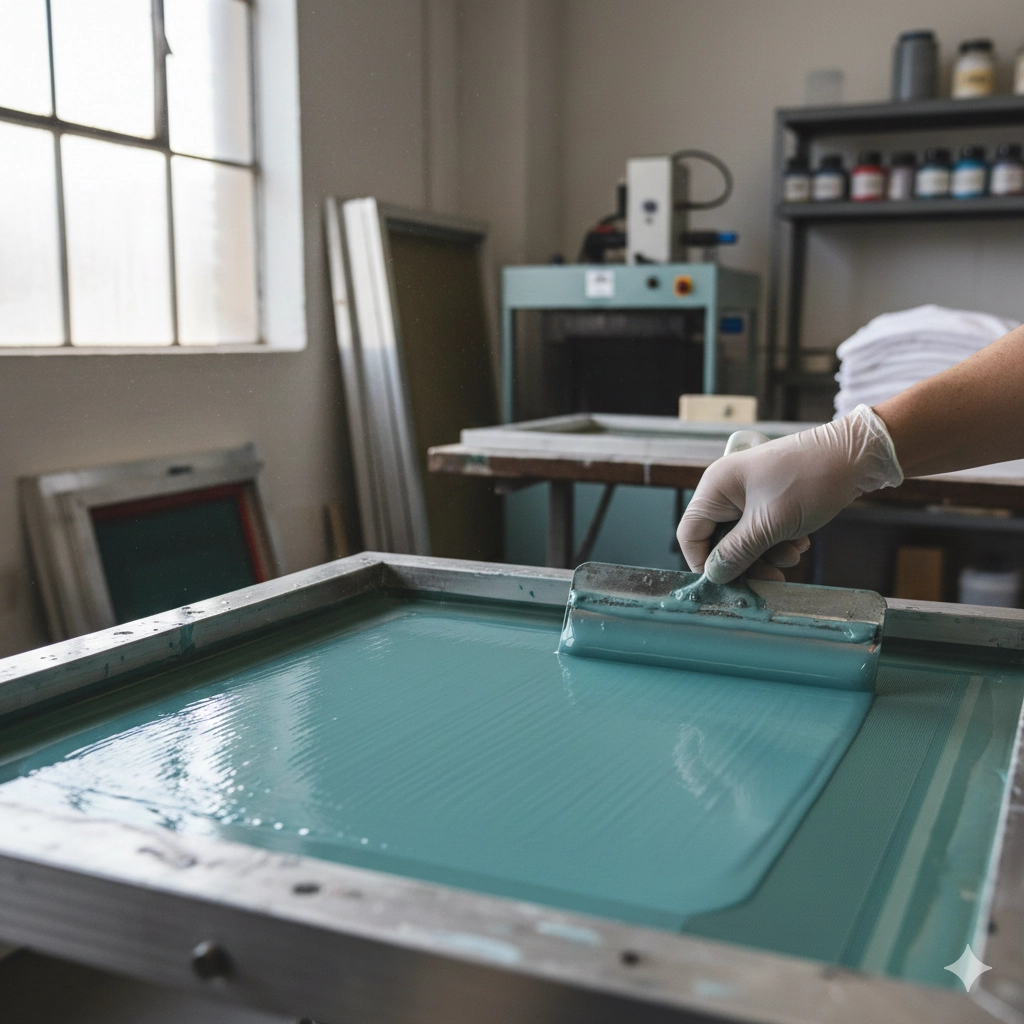
Platemaking Equipment
No screen, no print. Platemaking gear is what turns your design into a usable screen, and you need a few key pieces: emulsion coater, exposure unit, and washout system.
- Emulsion Coater: This thing slaps photosensitive emulsion evenly onto your screen—good coating, good screen. Manual coaters are cheap, a few hundred bucks, fine for small shops. Automatic ones cost more but save time and coat smoother. Pick one with a sturdy, flat trough; cheap ones leak emulsion and wreck screens.
- Exposure Unit: The machine that “burns” your design onto the screen. Light passes through a film positive, hardening the emulsion to form your pattern. Basic units run a few grand; high-end onesise with vacuum systems go for $10,000+. Look for even light distribution and precise exposure timing—crappy units blur your design.
- Washout System: Screens gotta be cleaned for reuse, and this makes it quick. Manual spray guns are a few hundred bucks; automatic washout booths run $3,000 to $10,000. Check nozzle pressure and solvent compatibility—good systems clean fast without trashing the screen.
Don’t skimp on platemaking gear. Low-quality stuff wastes emulsion and screens, costing you more in the long run. Got the cash? Go for automated features—faster and sharper results.
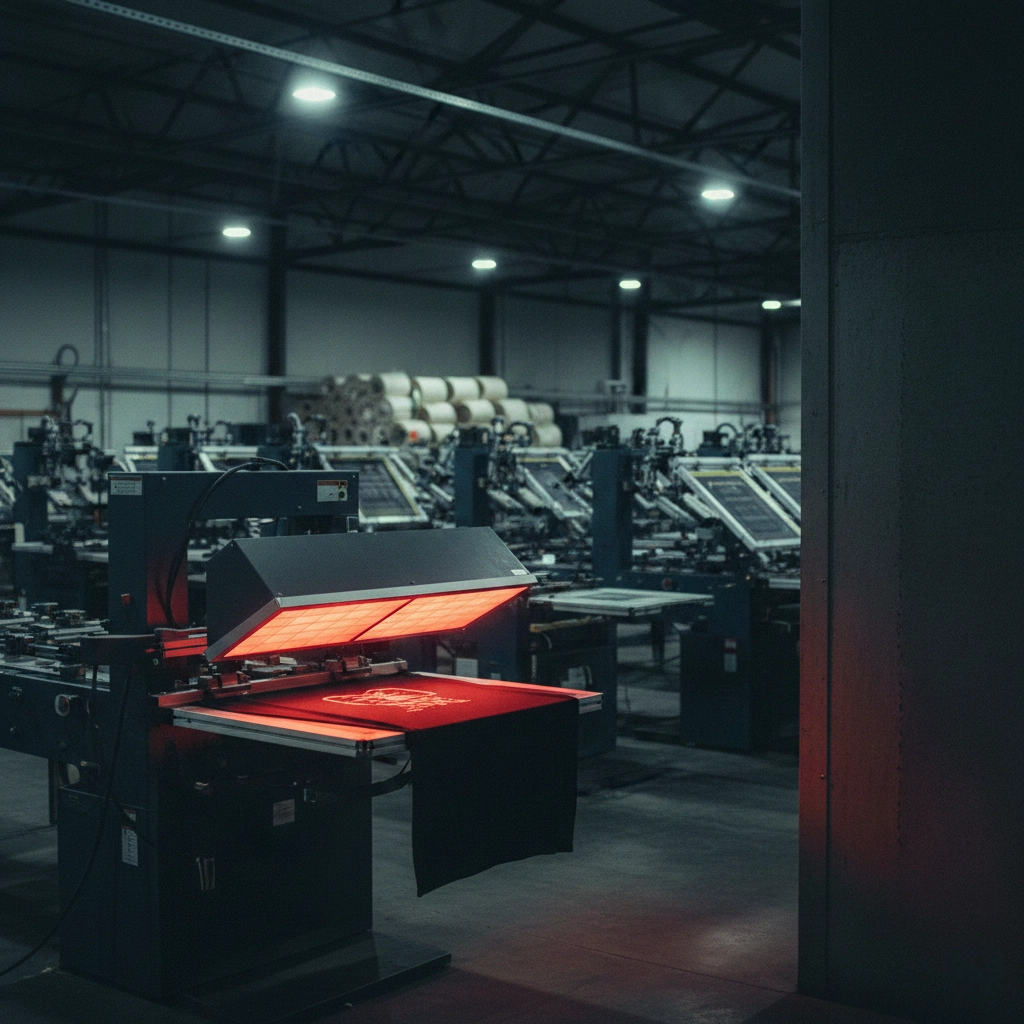
Drying Equipment
Printed ink’s gotta dry solid, or it’ll smear. Drying gear is make-or-break for quality, and you’ve got flash dryers, tunnel dryers, and heat presses to choose from.
- Flash Dryer: A must for multi-color jobs, drying each layer to avoid smudging. Prices range from $2,000 to $15,000, great for small to mid-size shops. Pros: portable, perfect for T-shirts. Cons: slow for big runs, and uneven heat can scorch fabric. Check heating coverage and temp control.
- Tunnel Dryer: The go-to for high-volume shops, with a conveyor belt running materials through a heated zone for quick curing. These cost $20,000 to $100,000+. Pros: fast, continuous operation. Cons: takes up space, guzzles power. Look for a long belt and adjustable temp settings—short belts under-cure.
- Heat Press: Used for heat transfers or specialty work like foil or flocking. Prices run $1,000 to $20,000. Pros: delivers premium effects. Cons: niche use, not essential for small shops. Ensure even pressure and precise temp control.
Match your dryer to your workload. Flash dryers handle small shops; tunnel dryers are for big orders.
Consumables and Support Tools
Machines are useless without the right supplies and tools. Ink, screens, squeegees, and design software are your daily bread.
- Ink: Water-based inks are eco-friendly for fabrics; plastisol’s durable for hard surfaces; UV inks dry fast for precision work. Stick with trusted brands (like Wilflex or Rutland) and test viscosity and colorfastness—cheap ink clogs screens or fades fast.
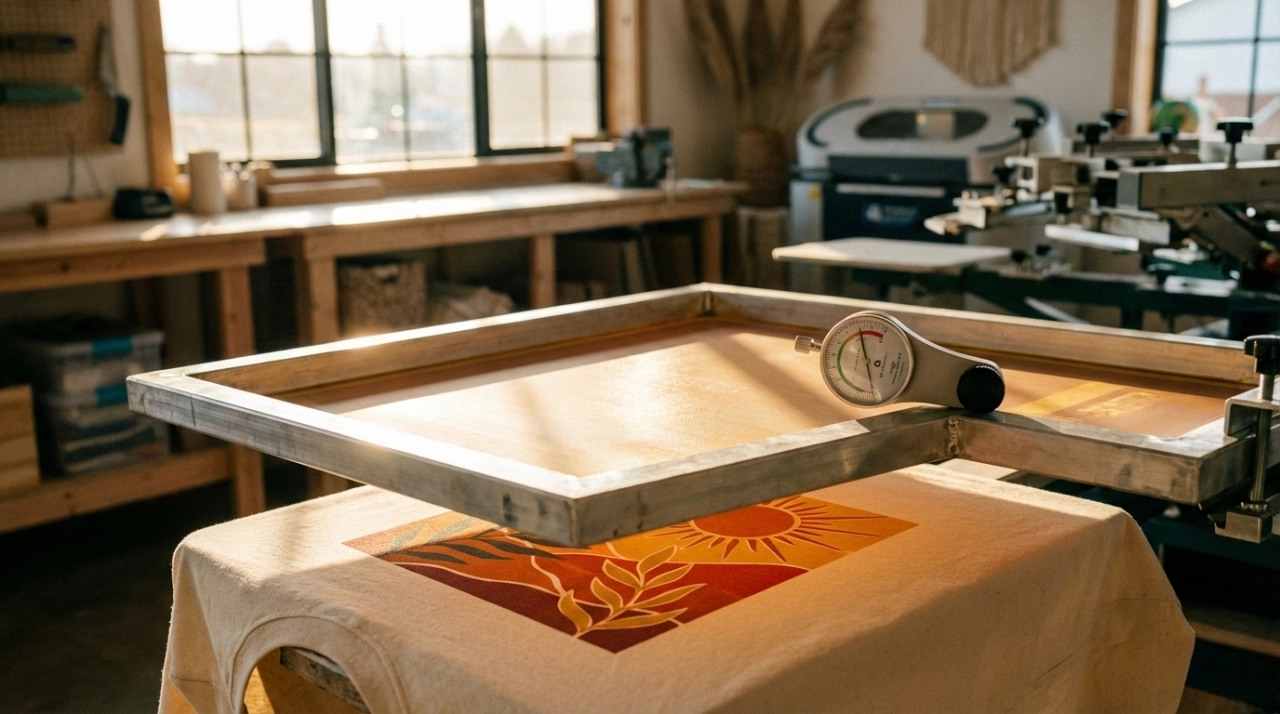
- Screens: Mesh count (threads per inch) sets precision. Low counts (80-120) for bold designs, high counts (200+) for fine details. Aluminum frames last; wooden ones are cheaper. Pick based on budget and how often you print.
- Squeegees: Hard blades for sharp patterns, soft ones for broad coverage. Look for smooth edges and comfy handles—ergonomics matter when you’re scraping all day.
- Design Software: Adobe Illustrator or CorelDRAW for creating and outputting film positives. Can’t design? Hire someone or outsource. Skimping here tanks your product’s appeal.
Don’t cheap out on consumables. Quality ink and screens make or break your prints—bad stuff leads to rework. Stock up on cleaning solvents, gloves, and rulers to keep your workspace tight and your workflow smooth.
Equipment Buying Guide
Pick the right gear, and your shop runs like a dream. Pick wrong, and you’re bleeding cash with nothing to show. Knowing what machines you need is half the battle—now you gotta buy smart. Budget, brand, new vs. used, and workspace setup all need to play nice. Here’s a no-nonsense guide to spending your money wisely and dodging traps.
Budget Planning
Before you drop a dime, size up your wallet and your business plan. Starting small, printing tees in your garage? A few thousand bucks gets you going—manual press, basic platemaking tools, flash dryer, plus ink and screens. Aiming for mid-size, like cranking out hundreds of shirts for local businesses? Budget $10,000 to $20,000 for a semi-automatic press, solid exposure unit, and tunnel dryer. Going all-in, supplying national brands? Full-auto lines, high-end platemaking, and automated drying systems run $100,000 to millions.
Don’t bite off more than you can chew. Match your gear to your orders and cash flow. Small shops don’t need full-auto presses—they’re pricey and sit idle. Big operations can’t limp along with manual gear—too damn slow. Break your budget into core equipment (press, platemaking, drying) and consumables, and stash some cash for maintenance and restocking. Build slow—don’t expect to go from zero to hero overnight.
Brand and Quality
Your gear’s brand and build are the backbone of your shop. Solid brands save headaches and keep your work tight. Cnding got a rep in the screen printing world, with everything from manual presses to semi-auto rigs, plus platemaking and drying gear. Their manual presses are dead simple for newbies; semi-auto models churn through bulk orders. Their high-end auto presses tackle big jobs, pricier but precise and tough as nails.
Quality’s in the details. Check the press frame—steel outlasts aluminum. Platemaking gear needs even light sources; leaky units trash screens. Dryers demand steady temp control—wild swings ruin materials. Ask suppliers for a test run or sample. Scour online reviews and skip the sales pitch. Spend a bit more for gear that lasts over junk you’ll fix every week.
New vs. Used Equipment
New or used? It’s a head-scratcher. New machines shine: reliable performance, warranties, and tech support for peace of mind. Downside? They’re pricey, $5,000 to $100,000+, tough for small shops. Used gear can cost half as much, and a well-kept Cnding rig still prints like a champ. But there’s risk—hidden wear, no support, and repair bills that add up.
Buying used takes know-how. Inspect wear on press bearings and platemaking vacuum systems. Demand usage history and repair logs. Bring a buddy who knows the trade to spot red flags. eBay and Craigslist have deals, but watch for scams. New gear? Go straight to Cnding site or authorized dealers to avoid markups. Rule of thumb: got the cash, buy new for reliability. Strapped? Hunt used, but do your homework to avoid a lemon.
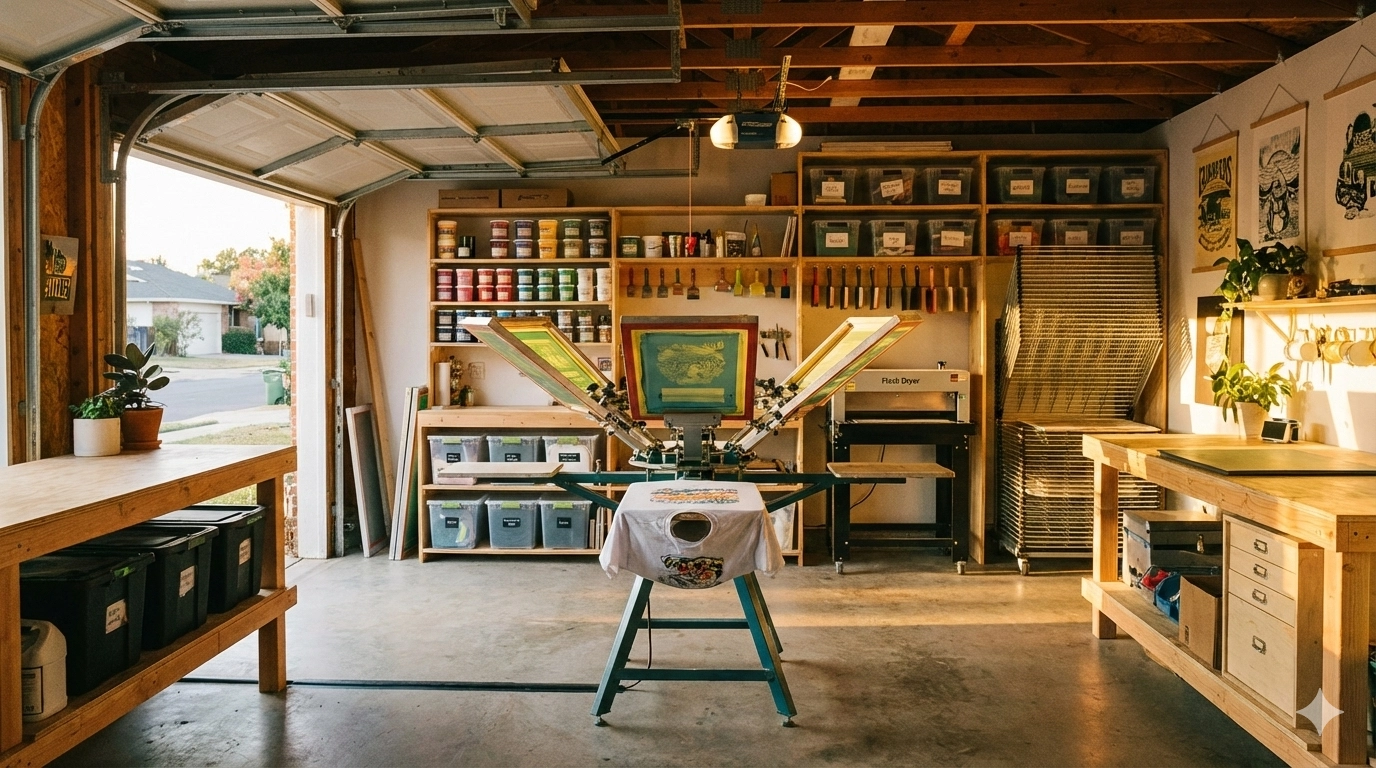
Space and Environment Needs
Your gear needs a home, and screen printing ain’t forgiving about space and setup. Plan wrong, and you’re tripping over machines or frying circuits. Small shops can squeeze a manual press, flash dryer, and platemaking gear into a 10×10-foot (3×3-meter) garage. Semi-auto and full-auto rigs need 20×20 feet (6×6 meters) or more, plus room for materials and elbow space. Tunnel dryers are space hogs—some stretch 20 feet long—so measure twice.
Ventilation’s non-negotiable. Ink and solvents stink and aren’t great for your lungs. Set up in a spot with windows or fans; big shops need industrial exhaust systems. Power’s another beast. Manual gear runs on standard outlets, but Cnding semi-auto and full-auto presses need 220-volt industrial lines. Tunnel dryers gulp electricity—check power ratings or risk blowing fuses. Floors gotta be level; wobbly presses mess up prints. Waterproof flooring or mats make cleaning ink and chemicals a breeze. Sketch a layout—machines, tools, and supplies all need a spot—to keep your workflow humming.
Frequently Asked Questions
Diving into screen printing, buying gear is just the start. Maintenance, setup, cost-efficiency, and upgrades can trip you up. Here’s the straight dope on common questions, packed with real-world tips to keep you out of trouble.
How Do I Maintain and Service Screen Printing Equipment?
Machines are like trucks—treat ‘em right, or they’ll break down. Presses need regular cleaning to clear ink buildup, especially around screen clamps and squeegee tracks; gunked-up parts jam and throw off alignment. Wipe with soft cloths and dedicated cleaners—hard scrapers nick surfaces. After each job, pop off screens and blast ‘em with a pressure washer or solvent, then dry and store to keep emulsion from clogging.
Platemaking gear’s finicky. Keep exposure unit glass spotless—dust scatters light and wrecks screens. Rinse emulsion coater troughs right after use; dried emulsion’s a nightmare to scrub. Dryers need TLC on their temp systems. Check flash and tunnel dryer heating elements monthly—overheating fries parts, and shaky temps burn materials.
Lube press bearings and moving parts every couple months with industrial-grade oil to keep things gliding. Inspect power cords and plugs for wear—frayed wires spark trouble. When idle, throw dust covers over machines; humidity rusts metal. Spend ten minutes daily cleaning and a half-hour monthly on full checks—tighten bolts, calibrate press alignment. Do it right, and your gear lasts years, saving you repair cash for a few cold ones.
Do Beginners Need All the Equipment?
Newbies always ask: gotta buy everything upfront? Nah, depends on your gig. Small side hustle, like printing tees in your basement? A manual press, basic exposure unit, and flash dryer get you rolling, plus some ink and screens. That’s a few grand, wallet-friendly, and you can take small orders while learning the ropes. Mid-size, handling hundreds of shirts? Step up to a semi-auto press and tunnel dryer, budgeting $10,000 to $20,000. Big leagues, churning out thousands? Full-auto lines, fancy platemaking, and automated dryers cost $100,000 to millions—not for rookies.
Don’t go all-in early. Without steady orders, gear collects dust, and you’re out cash. Start lean, master the craft, and gauge demand. Platemaking a pain? Outsource screens to a local shop—cheap and you might pick up tricks. When orders and cash flow stabilize, bring platemaking in-house. Don’t skimp on software—Adobe Illustrator makes pro designs that sell. Focus on nailing jobs first, then scale up gear.
How Do I Balance Equipment Costs and Production Efficiency?
Expensive gear ain’t always better, but cheap stuff’s usually junk. Balancing cost and output means running the numbers. Manual presses are wallet-friendly, a few grand, great for small runs, but printing hundreds of tees by hand will kill your arms and your schedule. Semi-auto presses, $10,000 to $20,000, speed things up and handle bulk with less sweat, saving time and labor. Full-auto rigs, $100,000+, are beasts but pointless unless you’re drowning in orders.
Match gear to your workload. Small shops need reliable basics—solid quality, low maintenance, and they’ll pay off even with light jobs. Mid-size? Invest in a semi-auto; one good machine outruns three shaky ones, boosting capacity. Figure your ROI: how fast does a semi-auto’s time and labor savings cover its cost? Don’t obsess over upfront price—faster gear means more orders and bigger paydays. Skimp on ink, and you’re screwed—cheap stuff clogs screens and fades, hiking rework costs. Go mid-to-high-end for ink to save hassle. Used gear’s a steal, cutting costs in half, but vet it hard to avoid a money pit.
When and How Should I Upgrade Equipment?
Upgrade when orders outgrow your gear or bottlenecks choke you. Starting out, with steady new clients but a manual press that can’t keep up, you’re losing money. Swap for a semi-auto press—faster, more orders, fatter checks. Mid-size shop, semi-auto maxed out, clients hounding you, and your dryer’s too slow? Time for a full-auto line or tunnel dryer.
Don’t upgrade blind. Pinpoint the weak link. Press dragging? Get a semi- or full-auto. Screens coming out fuzzy, clients griping? Grab a better exposure unit. Drying can’t keep up, materials stacking up? Tunnel dryer’s your fix. Tight budget? Upgrade in stages—tackle the worst problem first, like the press, and hold off on platemaking. Research new gear for energy-saving or automated features. Talk to other printers, soak up their upgrade stories. Renting’s smart—test before you buy. Keep upgrades tied to order growth; don’t blow cash on gear you can’t fill.