How to Use a Heat Press Machine
Heat press machines have become indispensable tools in the modern printing and customization industry, offering businesses the ability to create high-quality, durable transfers on a wide variety of substrates. For companies specializing in textile printing, promotional products, or custom apparel, mastering the heat press process is essential for delivering professional results that meet client expectations.
At Cnding, we understand that proper equipment operation is crucial for business success. This comprehensive guide will walk you through everything you need to know about using a heat press machine effectively, from basic setup to advanced troubleshooting, helping you maximize productivity and ensure consistent, high-quality output for your customers.
What is a Heat Press Machine
A heat press machine is a specialized device designed to transfer designs, graphics, and images onto various substrates through the application of controlled heat and pressure. These machines consist of three main components:
- Heating Element: Generates and maintains the required temperature for the transfer process
- Heat Platen: Distributes heat evenly across the surface area of the substrate
- Pressure Mechanism: Applies consistent pressure to ensure proper adhesion of the transfer material
Heat press machines come in various configurations, including manual, semi-automatic, and fully automatic models. The choice depends on your production volume, substrate types, and business requirements. For businesses with diverse needs, Cnding offers a range of printing solutions that complement heat press operations, including our oval printing machines for specialized applications and digital printing equipment for pre-press preparation.
When to Use a Heat Press Machine
Heat press machines are versatile tools that can be employed across multiple printing and decoration techniques. Understanding when to use a heat press will help you optimize your production workflow and deliver the best results for your clients.
Sublimation Printing
Sublimation printing is ideal for creating vibrant, full-color designs on polyester fabrics and polymer-coated items. The heat press activates the sublimation process, converting solid dye into gas that permeates the substrate material. This technique is perfect for:
- Custom sportswear and athletic apparel
- Promotional items like mugs and phone cases
- Soft signage and banners
- Custom home décor items
Heat Transfer Vinyl (HTV)
HTV applications involve cutting designs from vinyl sheets and heat-pressing them onto garments. This method is particularly effective for:
- Team uniforms and numbering
- Corporate apparel with logos
- Fashion items with trendy designs
- Small-run custom orders
Direct-to-Film (DTF) Transfers
DTF technology allows for high-quality transfers on both light and dark fabrics. The heat press is essential for transferring the printed film onto the garment, offering excellent durability and vibrant colors. This method is suitable for:
- Complex, multi-color designs
- Cotton and blended fabrics
- High-detail photographic images
- Small to medium production runs
Plastisol Transfers
Plastisol transfers involve screen printing designs onto transfer paper, which are then applied to garments using a heat press. This technique is valuable for:
- High-volume production
- Consistent color reproduction
- Decorator programs and retail applications
- Multi-location designs
How to Set Up Your Heat Press Machine
Proper setup is crucial for achieving consistent, high-quality transfers. Follow these steps to ensure your heat press is configured correctly for your specific application.
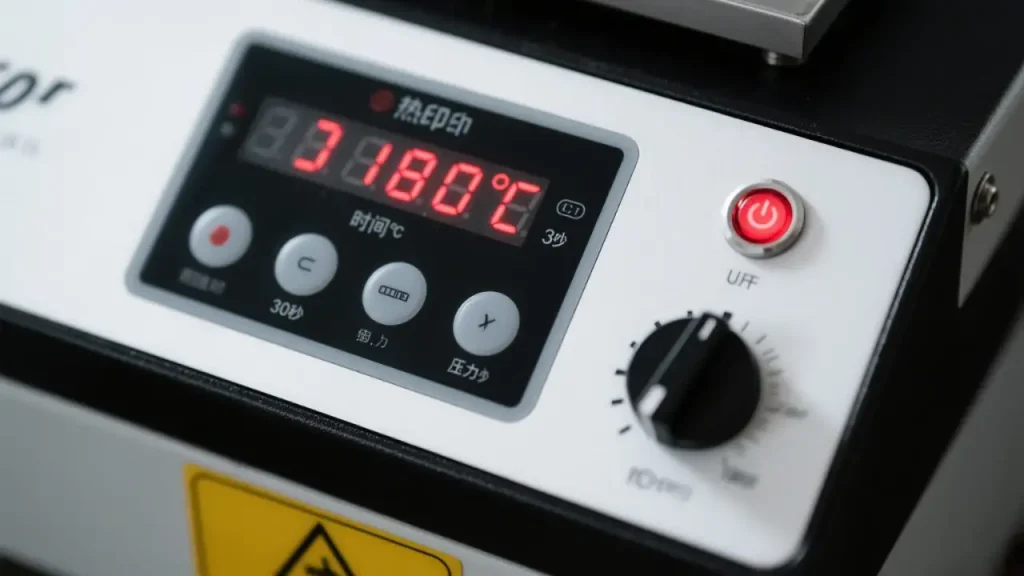
Temperature Settings
Temperature requirements vary based on the transfer type and substrate material. Here are general guidelines:
- Sublimation: 380-400°F (193-204°C)
- HTV (Heat Transfer Vinyl): 300-330°F (149-166°C)
- DTF Transfers: 320-350°F (160-177°C)
- Plastisol Transfers: 350-375°F (177-191°C)
Always refer to your transfer material manufacturer’s specifications for precise temperature requirements. Most modern heat press machines feature digital temperature controls that allow for precise settings and consistent heat distribution across the platen.
Pressure Adjustment
Proper pressure ensures even contact between the transfer material and substrate. Most heat presses use one of the following pressure adjustment methods:
- Manual Adjustment: Turn the pressure knob clockwise to increase pressure and counterclockwise to decrease it
- Digital Pressure: Some advanced models feature digital pressure readouts for precise control
To test if your pressure is correct:
- Place a sheet of paper between the platens
- Close the press and apply pressure
- Try to pull the paper out
- If it slides out with slight resistance, the pressure is correct
- If it comes out too easily, increase pressure
- If it’s difficult to remove, decrease pressure
Time Settings
The duration of the press cycle affects transfer quality and durability. General time guidelines include:
- Sublimation: 45-60 seconds
- HTV: 10-15 seconds
- DTF Transfers: 8-12 seconds
- Plastisol Transfers: 7-10 seconds
Again, always consult your transfer material’s specific instructions for optimal results.
Step-by-Step Guide to Using a Heat Press Machine
Follow these detailed steps to achieve professional-quality transfers with your heat press machine:
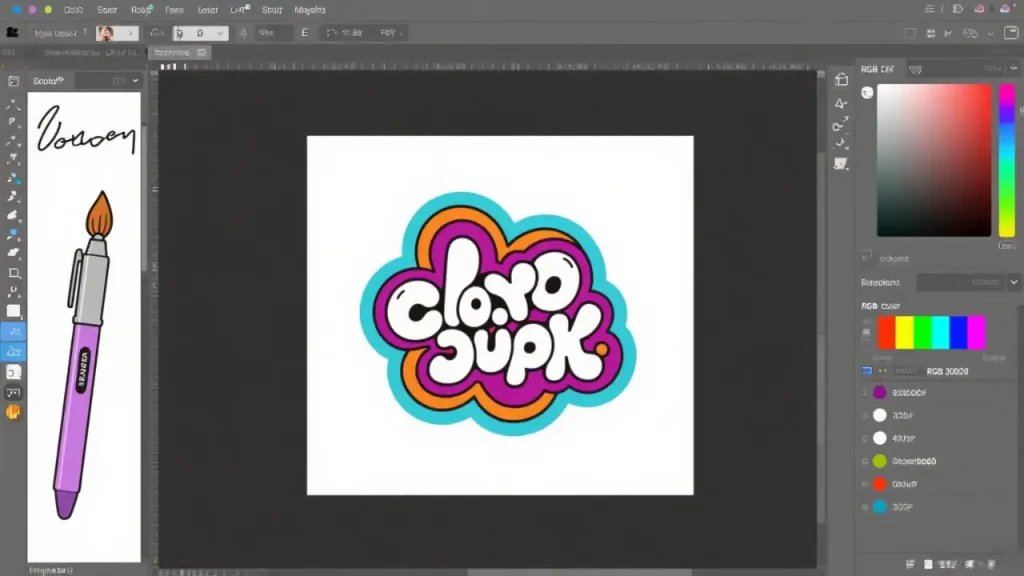
Step 1: Prepare Your Design
Before beginning the heat transfer process, ensure your design is properly prepared:
- Create or Select Your Design: Use professional design software to create your artwork or select from your design library
- Mirror the Image: Most transfer processes require mirroring the design before printing
- Check Resolution: Ensure your design is at least 300 DPI for optimal print quality
- Choose the Right Color Mode: Use RGB for digital design and CMYK for print applications
- Convert Text to Outlines: This prevents font compatibility issues during printing
For businesses requiring high-quality pre-press preparation, Cnding’s digital printing equipment can help ensure your designs are production-ready.
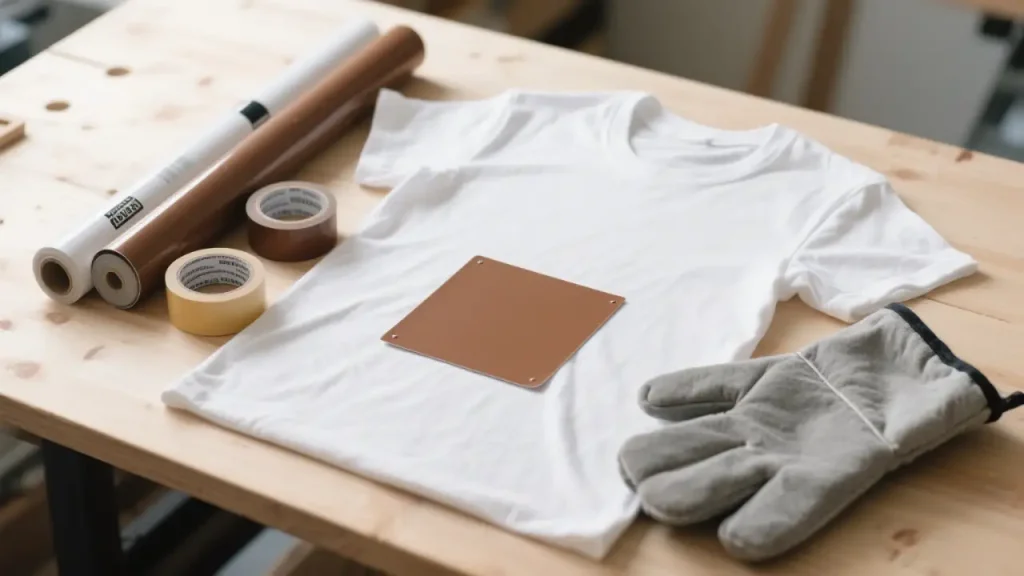
Step 2: Prepare Your Materials
Gather all necessary materials before starting:
- Substrate: Ensure garments or items are clean, dry, and wrinkle-free
- Transfer Material: Select the appropriate transfer type for your application
- Cover Sheet: Have a Teflon sheet or parchment paper ready
- Heat-Resistant Tape: For securing transfers in place
- Protection Equipment: Heat-resistant gloves for safe handling
Pre-press your substrate for 3-5 seconds to remove moisture and wrinkles, which can interfere with transfer quality.
Step 3: Set Up Your Heat Press
- Power On: Turn on your heat press and allow it to warm up
- Set Temperature: Adjust to the recommended temperature for your transfer type
- Set Timer: Program the appropriate press duration
- Adjust Pressure: Set the correct pressure based on your substrate thickness
- Verify Settings: Double-check all settings before proceeding
Step 4: Position Your Materials
- Place Substrate: Position your garment or item on the lower platen, ensuring it’s flat and centered
- Position Transfer: Place your transfer material on the substrate, design-side down
- Secure with Tape: Use heat-resistant tape to prevent shifting during pressing
- Add Cover Sheet: Place a Teflon sheet over the transfer to protect both the material and the press
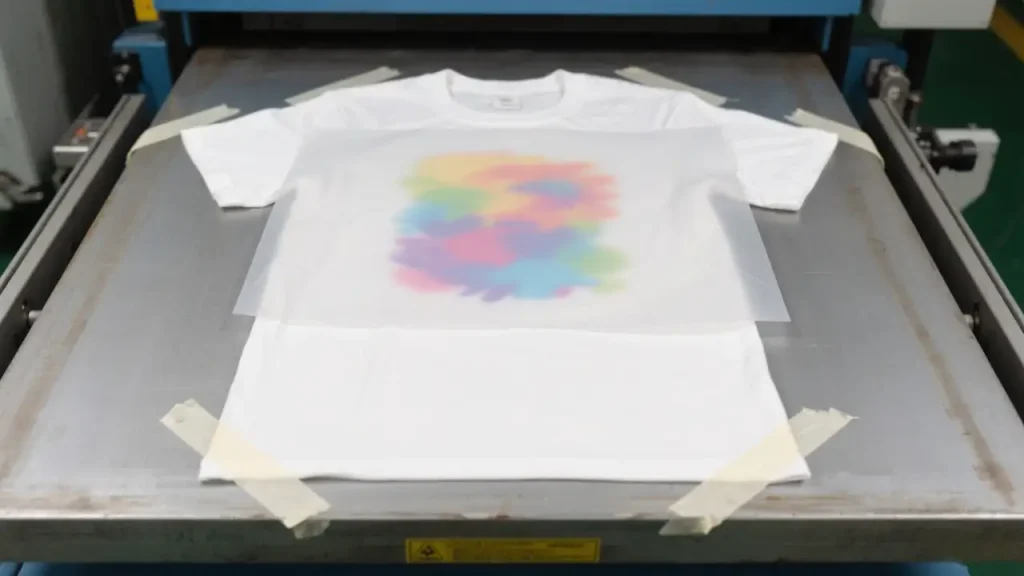
Step 5: Execute the Press
- Close the Press: Lower the upper platen and lock it in place
- Start Timer: Begin the press cycle
- Monitor Process: Watch for any issues during the press cycle
- Complete Cycle: Wait for the timer to finish

Step 6: Remove and Cool
- Open Press: Carefully lift the upper platen
- Remove Substrate: Take out your item using heat-resistant gloves
- Cool Down: Allow the transfer to cool according to manufacturer recommendations
- Peel Transfer: Remove the carrier sheet at the appropriate temperature (hot, warm, or cold peel as specified)

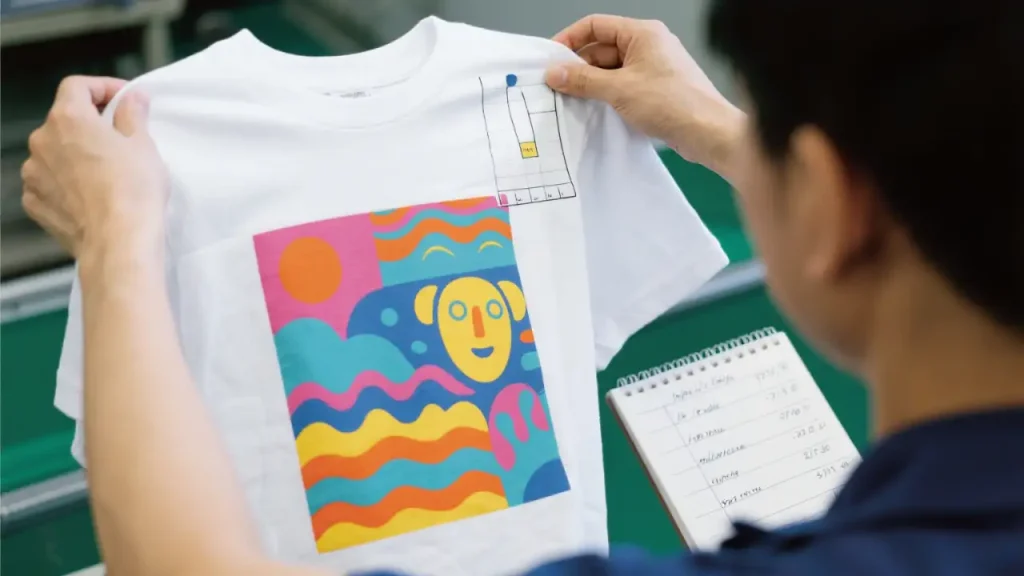
Step 7: Final Inspection
- Check Quality: Inspect the transfer for complete adhesion and proper appearance
- Test Durability: Perform a stretch test to ensure proper bonding
- Address Issues: Make note of any problems for troubleshooting
- Document Results: Record your settings for future reference
Troubleshooting Common Heat Press Issues
Even with proper setup and operation, issues can occur. Here are solutions to common heat press problems:
Transfer Not Adhering Properly
Causes:
- Insufficient temperature
- Inadequate pressure
- Short press time
- Contaminated substrate
Solutions:
- Increase temperature by 5-10°F increments
- Adjust pressure settings
- Extend press time by 2-3 seconds
- Ensure substrate is clean and dry
Image Fading After Washing
Causes:
- Incomplete transfer
- Incorrect temperature
- Poor quality transfer material
Solutions:
- Verify temperature settings with a thermometer
- Extend press time slightly
- Use higher quality transfer materials
- Consider a second press with cover sheet
Uneven Transfer
Causes:
- Inconsistent pressure
- Warped platen
- Substrate thickness variations
Solutions:
- Test pressure with paper method
- Check platen for flatness
- Use padding for uneven substrates
- Consider a press with interchangeable platens
Scorching or Discoloration
Causes:
- Excessive temperature
- Extended press time
- Sensitive materials
Solutions:
- Reduce temperature
- Shorten press time
- Use a Teflon sheet as a barrier
- Test on scrap material first
Transfer Peeling or Cracking
Causes:
- Insufficient adhesion
- Material incompatibility
- Improper washing
Solutions:
- Increase pressure or temperature
- Verify material compatibility
- Provide proper care instructions to customers
- Consider using a different transfer type
Essential Heat Press Accessories
To maximize the versatility and effectiveness of your heat press operations, consider these essential accessories:
Teflon Sheets
Teflon sheets protect both your heat press platen and your transfers from damage. They prevent ink buildup on the platen and ensure clean releases. Available in various sizes to match your press dimensions.
Heat Press Pillows
These accessories help maintain even pressure when pressing items with seams, zippers, or uneven surfaces. They’re particularly useful for:
- Polo shirts with buttons
- Jackets with thick seams
- Hats and caps
- Items with embroidery or embellishments
Interchangeable Platens
For businesses handling diverse product types, interchangeable platens offer versatility by allowing quick changes between different pressing surfaces. Cnding’s commitment to flexible manufacturing solutions extends to supporting businesses that require such adaptable equipment.
Heat-Resistant Tape
This specialized tape secures transfers in place during pressing, preventing shifting that can result in misaligned designs. It withstands high temperatures without leaving residue.
Temperature Test Strips
These strips help verify that your heat press is reaching and maintaining the correct temperature, ensuring consistent results across production runs.
Maintenance and Care for Your Heat Press Machine
Proper maintenance extends the life of your heat press and ensures consistent performance:
Daily Maintenance
- Clean Platens: Wipe down both upper and lower platens with a soft cloth after each use
- Remove Residue: Clean any transfer material residue immediately
- Check Pressure: Verify pressure settings remain consistent
- Inspect Cords: Ensure power cords are not damaged or frayed
Weekly Maintenance
- Deep Clean: Perform a thorough cleaning of all surfaces
- Lubricate Moving Parts: Apply high-temperature lubricant to hinges and pressure mechanisms
- Check Calibration: Verify temperature accuracy with a thermometer
- Inspect Safety Features: Test all safety mechanisms and emergency stops
Monthly Maintenance
- Professional Inspection: Consider having a technician inspect the machine
- Replace Worn Parts: Check and replace any worn or damaged components
- Update Records: Document all maintenance activities for future reference
- Review Performance: Analyze production quality and consistency
Integrating Heat Press with Other Printing Technologies
For comprehensive printing solutions, heat press machines often work in conjunction with other printing technologies. At Cnding, we offer a range of equipment that can enhance your heat press operations:
Pre-Press Preparation
Our digital printing equipment can prepare high-quality transfers for your heat press, ensuring consistent color reproduction and sharp details.
Screen Printing Integration
For businesses combining screen printing with heat transfer applications, our oval screen printing machines offer efficient production of plastisol transfers and other heat-applied graphics.
Post-Press Processing
After heat pressing, items may require additional processing. Our stretching machines can help prepare garments for finishing, while our drying cabinets ensure proper curing and drying of printed items.
Exposure Machine Applications
For businesses creating their own transfers, our exposure machines can be used to produce high-quality screens for transfer production.
Safety Considerations for Heat Press Operation
Operating a heat press machine safely is essential for protecting both operators and equipment:
Operator Safety
- Heat Protection: Always use heat-resistant gloves when handling hot items
- Ventilation: Ensure proper ventilation in the work area
- Clothing: Avoid loose clothing that could catch in the machine
- Training: Ensure all operators are properly trained on equipment use
Equipment Safety
- Power Requirements: Use appropriate electrical outlets and power sources
- Stable Surface: Place the machine on a level, stable surface
- Clear Area: Keep the area around the machine clear of obstructions
- Emergency Procedures: Establish and communicate emergency shutdown procedures
Conclusion
Mastering the use of a heat press machine is essential for businesses in the printing and customization industry. By following the guidelines outlined in this comprehensive guide, you can achieve consistent, high-quality results that meet the demanding standards of B2B clients.
At Cnding, we’re committed to providing not just superior printing equipment but also the knowledge and support needed to maximize your investment. Our range of printing machines—including oval printing machines, oval screen printing machines, digital printing equipment, stretching machines, exposure machines, and drying cabinets—are designed to work seamlessly together, offering complete solutions for your printing business.
- What is a Heat Press Machine
- When to Use a Heat Press Machine
- How to Set Up Your Heat Press Machine
- Step-by-Step Guide to Using a Heat Press Machine
- Troubleshooting Common Heat Press Issues
- Essential Heat Press Accessories
- Maintenance and Care for Your Heat Press Machine
- Integrating Heat Press with Other Printing Technologies
- Safety Considerations for Heat Press Operation
- Conclusion